How To DIY Save The Date Magnets In Only 10 Minutes
Follow this simple tutorial to DIY Save the Date magnets. Or get inspired by these unique ideas to design or buy your own wedding announcements with originality & style!

Personalized wooden wedding magnets are the perfect keepsake for the bride and groom, and all of their wedding guests! Magnets also make great wedding décor, and can also be sent along with save the dates!
The goal of a Save the Date is not just to announce your upcoming nuptials, but to keep your guests from booking alternative plans on the date of your wedding, n’est pas?
So, what better way to do this than sending them such adorable and unique Save The Date magnets they gotta stick them on their refrigerators?
DIY Save the Date magnets work very nicely as a wedding date reminder because people tend to place them at or above eye level instead of on top of a paper pile.
Added bonus: if they are cute enough, they may keep them even after the wedding!
We’ve rounded up a selection of our favorite Save the Date magnets and a step-by-step guide for you to make them at home. And as the first step is picking its design, check out this Save the Date magnets photo gallery ideas organized by wedding themes!
DIY Save The Date Magnets Ideas that Match your Wedding Theme
Send your guests Save The Date magnets aligned with your wedding theme to let your guests get a taste of what you have planned for the big day. Not only will they get a clue on what to expect but it will be a constant reminder of the fabulous event that’s soon approaching.

What a stylish way to announce your big city-day with this adorable little bottle. ($10+ each on Etsy!)

Coolest Save the date magnets for the Gamer couple! Beautiful 1/8 inch solid alder wood that is stained, sealed and lasered with your personal Save The Date information!
Custom made to order mini message in a bottle save the date. Music themed save the date magnet. Perfect for any style wedding! This save the date magnet is sure to be a hit. Magnet measures 5.5×4.25 which fits perfectly into an A-2 envelope!
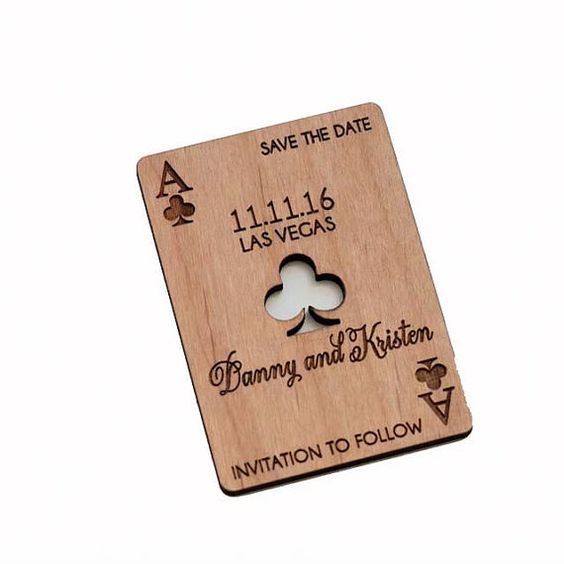
These save the date magnets are a unique and memorable way to remind your guests they need to keep your special day free on the calendar. (StylineDesigns)
Another Reason to Love Rustic Weddings: Cutest Save The Date Magnets!
I don’t thing there’s anything cuter than these rustic Save The Date invitation ideas. Well… maybe a basket of kittens… but you can’t send those to your guests… or can you? 😉 These invites announce a fun and original wedding in a lovely bucolic setting.

Take advantage of both sides of the save the date with a wooden heart tied to a string! By bateman designs.

Rustic weddings allow you to get so creative! (StylineDesigns)
Woohoo!! DIY Save The Date Magnets for Beach Weddings!
If you are planning a beach wedding (or a destination wedding at the beach), play with maps, shells, starfish or colors like turquoise, orange and sand tones. Your DIY Save The Date magnets will look stunning and who wouldn’t want to attend?

Natural beach theme Save the Date luggage tag magnet with map and a photo. (PartyGlamourShop)
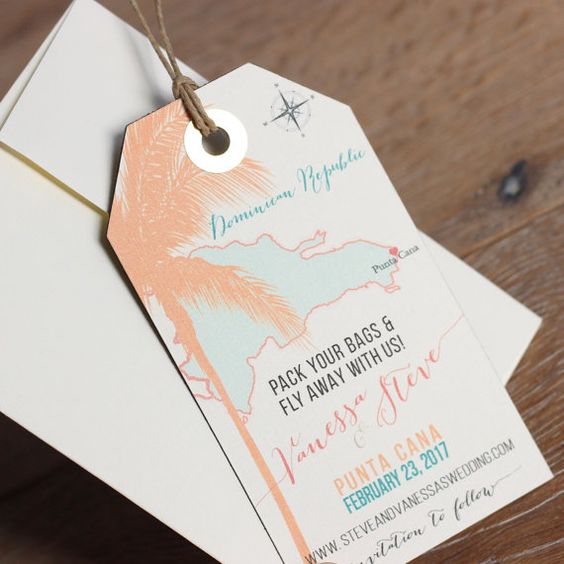
These Punta Cana Save the Date magnets with your marriage location marked with a heart will make a great first impression (Designer Fee $35 – Luggage Tag magnets start at $5+)
Winter Weddings and their Original Save The Date Magnets
There are no lack ideas because it’s a winter wedding and not everything has to have snow either. If your wedding is close to the holiday season, the use of red or green tones with a touch of glittery gold, will give a warm and festive look to your Save the Dates. These Save the Date magnets are the sweetest thing I’ve seen in a long time.
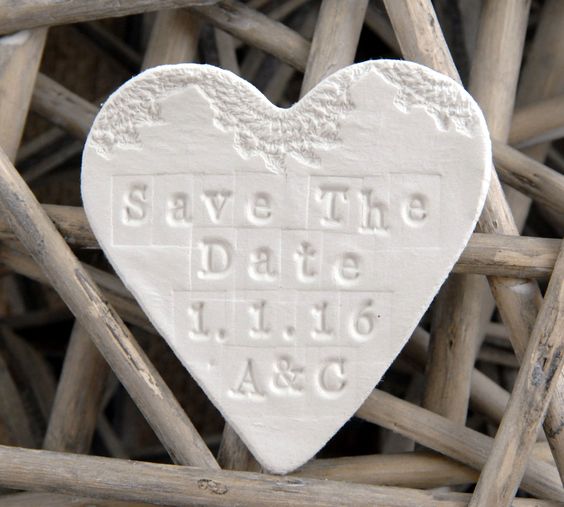
Personalized Save the Date clay wedding magnets. (Get the white heart save the date for only $3.99 each)
How About a Romantic Save the Date Magnet?
A romantic wedding deserves a delicate Save the Date. Blue, pink or blush are colors with endless possibilities for romantic weddings. Try to pick a slightly stronger shade for your romantic DIY Save the Date magnets. They will stand out more on the fridge.

Wow your guests with this personalized handmade design and include your own prints on this fingerprint calligraphy Save The Date magnet.

Kissing Polar Bear wood slice magnets. (MonkeysOnTheRoof)
Wanderlust DIY Save the Date Magnets for Traveling Couples
These ideas are for those who are hosting a wanderlust wedding. Use maps, plane tickets, passports, trams, photos of famous monuments … there’s no limit to the imagination!

Make your guests feel like rock stars when you send them personalized wedding save the date ticket magnets.
Get the first wedding Save the Date magnets at our shop. This boarding pass is mounted onto a magnetic backing so your guests can display it as a reminder of your upcoming nuptials! Wedding Save the Date magnet cards
Personalized Save the Date Magnets: Imprint Your Personality
Remind everyone who is getting married by personalizing your DIY Save the Date magnets with photos of the happy couple! Choose photos in small squares or strips photobooth style. If you are both Instagram fans, you can use the photos directly from there, okay? Okay!

Fun and personalized DIY Save the Date magnets for you to tell a story. Add a little whimsy to your wedding.
How to DIY Save the Date Magnets: Simple and Affordable
If you feel inspired and none of the save-the-date magnets you’ve seen reflects your personality, why not make your own? You can save a few bucks and that comes in handy.
So, the options are to buy them or make them yourself. Check out this step-by-step guide to make Save the Date magnets. Don’t let anyone forget about your special date!
The easiest way to make Save the Date magnets is to print the invitation on your computer, attach it to a thick card and add magnets that already come with one-sided glue. Simple and easy!
If you would like to work with clay or wood, print a design on it (or engrave it with a wood chisel), let it dry and adhere the magnet. You can buy the magnets online or at Hobby Lobby or Michael’s.
Here’s the list of materials you’ll need
- Software for photo editing or to create your own design.
- Magnets: There are three types, magnetic tape rolls, self-adhesive magnets, magnetic paper for inkjet or laser printers.
- Glue, if your magnets are not self-adhesive.
- Printer.
- Scissors or a blade (like the Exacto blades).

Super original DIY save the date magnets. (StylineDesigns)
Let’s Get Crafty!
1First, determine what type of magnet you want to work with as this will define your design size. Magnetic sheets are the easiest to use but they are also the thinnest. Magnetic rolls without adhesive are the thickest and you can cut them to any size you want.
2Now that you have the appropriate dimensions, design your Save the Date invitation. Remember to include at least the basic information: that you are getting married, both your names and the date of the wedding. You may also indicate that the formal invitation will arrive soon, where or how to get more information about the wedding, or if you expect them to respond to a phone number or email to confirm their attendance.
3The next step you can do at home with your own printer or commission the printing of your design to a printing and copying center or to a printer. If you print them at home, make sure your printer settings are set to the quality level required for printing on photo paper.
4Time to glue the magnets! If your magnets are the same size as your save-the-date, make sure they are well aligned and glue them together. If you decided to work with magnet rolls or magnetic sheets, print the design on the sheet and then cut the magnets with the Exacto knife. Now, if the magnets are self-adhesive, just remove the protective film and stick them to the back of your Save the Dates. Otherwise, use glue.
5Let the magnets dry. Now mail them or hand them out!
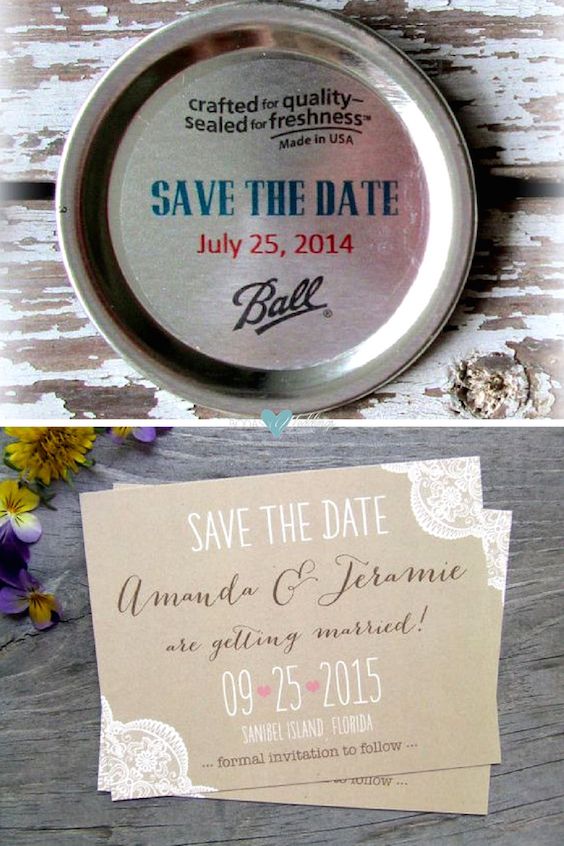
Learn how To DIY Save the Date magnets in only 10 minutes. Mason jar invite. Save the Date announcements
With care and attention to detail, you can create your own Save the Date magnets at a fraction of the cost that you would pay otherwise. They will be much more personalized and you can include details beyond the basics that are offered commercially. Have fun, be creative, and enjoy the process! And share photos of your DIY Save the Date magnets with us!

Your relationship is as unique as a fingerprint. Celebrate the uniqueness of your love story and DIY this modern save the date with paper ink and a magnet.
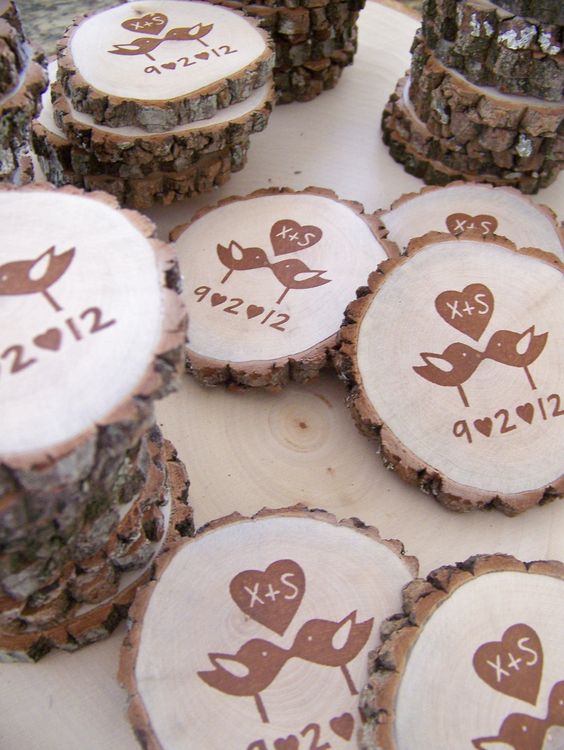
Design your own stamp and MonkeysOnTheRoof will etch it on wood for you!
Discover More Stunning Wedding Ideas
Photography credits: Hitched, notonthehighstreet, Kaspi Party






Loved it!! So easy and simple…. I’m thinking of designs already!!
Thank you Jennifer!! 🙂